
To the Vietnamese, Moon Festival is also a children Festival where the kids get to play with colorful, animal shaped lanterns while enjoying the sweet treat moon cakes. Speaking of moon cakes, this is my third year making them. Although I don't eat much of them, I love making these to give out to friends and family. The process is quite complicated and very time consuming. I do suggest to set some dedicated time aside if you decide to make them since it could take a whole day if not more to prepare them. But when you sit down with a slice of homemade moon cake and a cup of tea to enjoy the bright, shinning moon in a breezy air night, it's all worth it.


Ingredients:
For the lotus seed filling:
1. 2 lbs dried lotus seeds (you can find these in any Asian supermarket)
2. 1 1/2 lbs sugar
3. 450ml of canola oil
4. 1 tsp salt
5. 2 tsp vanilla extract
6. 5 tbsp of cooked glutenous rice flour (also available in Asian market)

Drain and rinse well several times with water mixed with vinegar to eliminate the smell of lye water.
Transfer the lotus seeds into a medium pot, add enough water to cover the lotus seeds and 1 tsp of salt. Cook until the lotus seeds become tender and the water is almost gone.
Pour the lotus and the water left in the pot to a blender or food processor and blend well until smooth. Transfer the pureed lotus seeds into a large frying pan and add sugar. Constantly stir the mixture on low-medium heat as showed in the below picture until slightly thicken then add the cooked rice flour 1 tbsp at a time.

Continue to stir on low heat for another 5-10 minutes until the texture looks like paste and won't stick to your hand when touching it. It takes about almost 1 hour from start to finish. Remove from heat and let the lotus seed paste cools down before handling.

Once the lotus paste cools completely, divide it into little balls weight about 3/4 of your moon cake total weight (for example, if your moon cake weights 200g, then the lotus paste filling should weight about 150g including the salted egg yolk and the shell should weight about 50g). Make a ball and flatten it, then place the salted egg yolk in the middle, wrap the lotus seed filling around the egg yolk to enclose it.

For the salted eggs:
To make about 40 salted eggs, boil 700mg salt in 2.5 liters of water mixed with 50ml of cooking wine, 1 tsp sugar, 4 star anise and 1 cardamom. Bring to boil for a few minutes and turn off the heat. Once the salted water is cooled to room temperature, place the cleaned eggs neatly in a large jar and pour the salted water over. Make sure the eggs are completely submerged in the water. Use some heavy object like a small bowl or plate to place on top of the eggs. Cover tightly and set aside for the eggs to get salted and will be ready in about 5 weeks.
When the eggs are ready, crack them open, peel off the egg white completely. Soak them in some cooking wine, drain, sprinkle some vanilla extract on top and bake them briefly for 8-10 minutes at 350F. Drizzle a tbsp of sesame oil on the eggs after they are done and save them later for the moon cakes

For the dough: (Enough for 15-20 cakes)
1. 1 lb All purpose flour
2. 14 oz of golden syrup (recipe below)
3. 4 oz of cooking oil
4. 3 egg yolks
5. 2 tsp of lye water
6. 1 tsp of baking power
For the egg wash:
1. 2 egg yolks
2. 1 tbsp oil
3. 1 tsp of the golden syrup
Mix well together
For the golden syrup recipe:
1. 2.5 lbs of sugar
2. 2.5 lbs of water
3. 1/8 cup of fresh lemon juice
4. 1/8 cup of lye water mixed with 1/8 cup of water
Add water and sugar in a medium pot, mix well until the sugar dissolved. Use 1 bamboo chopstick to measure the level of the water. Mark the level of the water on the chopstick with a pencil. Take the chopstick out and divide the measured distance into 3 equal parts. On the top part of the chopstick, divide it again into 3 equal parts.
Bring the sugar/water mixture to a gentle boil under medium heat. Make sure not to stir or cover the pot. When the water evaporates to the 1/3 mark on the chopstick, add lemon juice and stir gently. Continue to boil until the water comes down to the 2/3 mark on the chopstick then add the lye water mixture. The syrup will change its color into an amber, honey color. Let the mixture boil for 5 more minutes before turning off the heat. Keep the syrup in an air tight container. This syrup preparation has to be done a few months ahead since the older the syrup, the better it is for the cake.

To make the dough:
Sieve the flour and baking powder together in the stand mixer. Slowly add the syrup, oil, and lye water into the flour. While mixing, add egg yolks 1 at a time into the flour mixture and continue to mix for about 5 minutes. The dough at this stage will be very wet and sticky. Cover the dough with a plastic wrap and let it rest for about 15 minutes.

Pour the dough out on a baking mat with a cup of all purpose flour on the mat, start kneading the dough by hand while folding the extra flour into the dough until it forms a nice, smooth dough ball that does not stick to your hand any more when touch. (Add more flour as needed).

Divide the dough into little round balls weighing about 50g each.

Roll the dough out and hold it in one hand while placing the lotus seed filling ball in the middle of the rolled out dough.
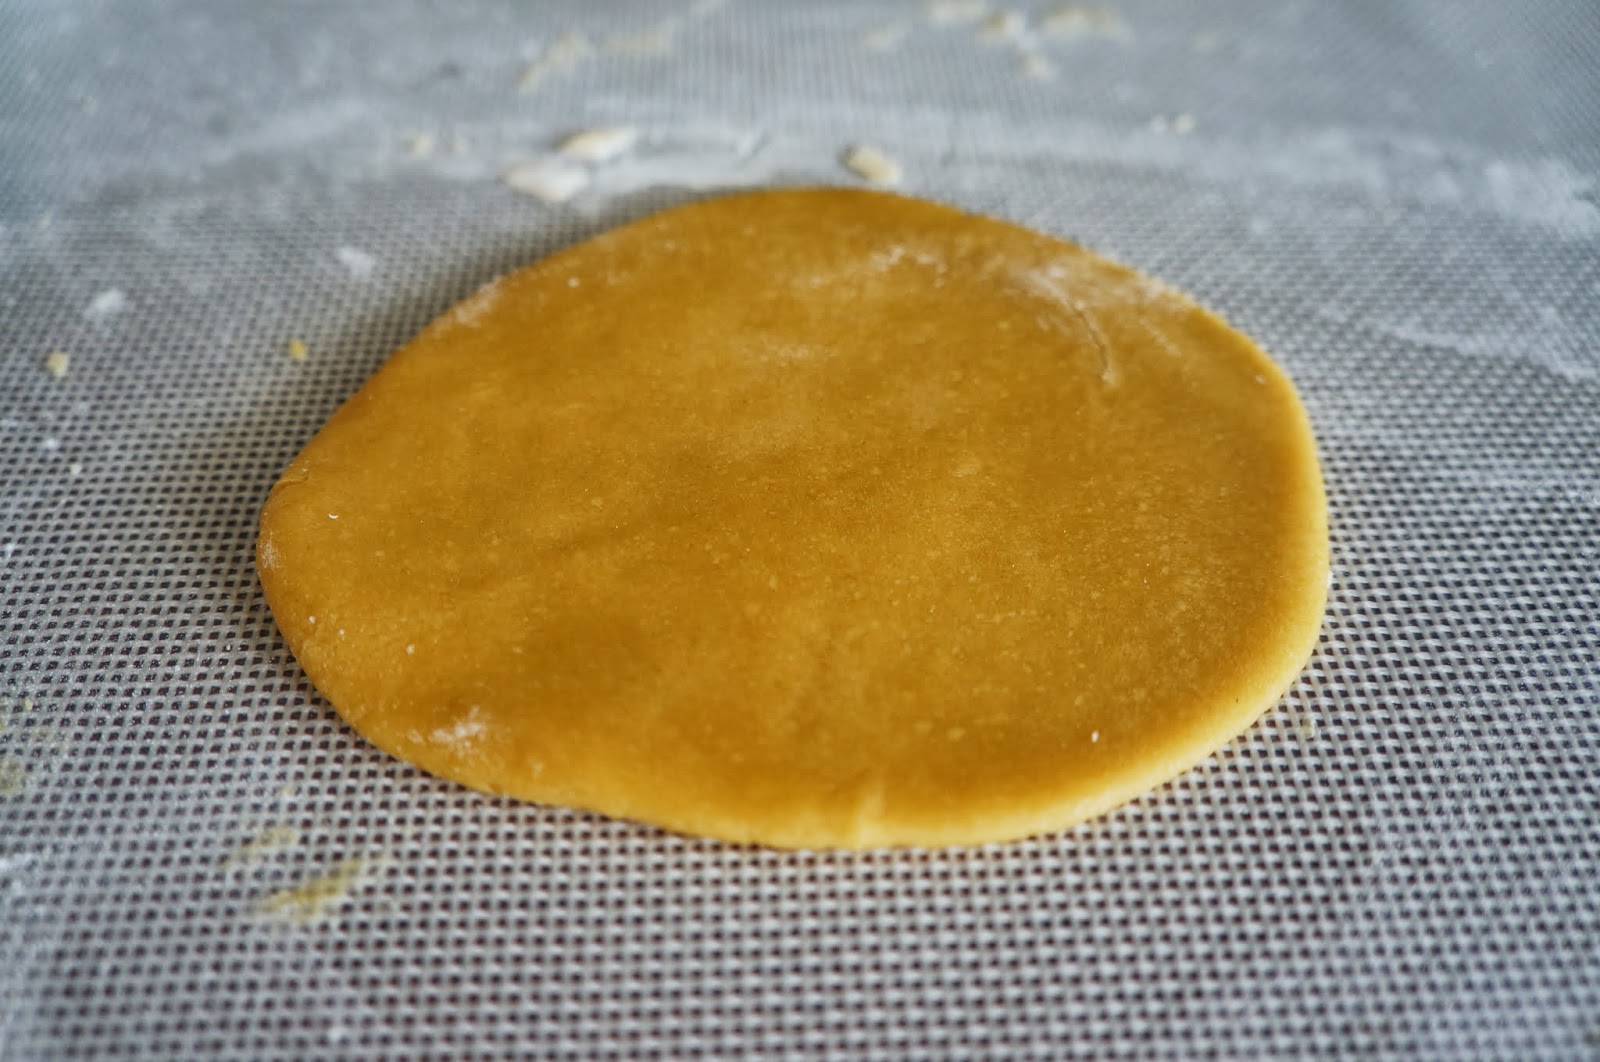
Slowly stretch the dough upward to cover the entire lotus seed ball and make it into one big, round, smooth ball as seen in below pictures


Coat the moon cake mold with some flour, shake out the excess flour and fill the mold with the moon cake ball. Press firmly on the ball to help it fill up the mold.

Continue to press the moon cake into the mold to get design imprinted sharply on the moon cake. The cake should fit the mold perfectly as seen the below picture (I used the mold that produces 200g cakes).

Press on the handle to spring out the cake from the mold, place them nice and neatly on the lined baking tray. Use a toothpick and prick around the side of the cake about 5-6 holes to help release the steam while baking.


Preheat the oven at 350F, put a tray of water on the bottom rack of the oven to create moisture for the cakes and prevent them from cracking.

Place the moon cake tray in the oven and bake for about 8 minutes then remove from the oven and let it cool down for a few minutes before spraying water on the surface of the cake to help keeping it soft and moist. Continue to let the cakes cool down for 30 minutes then place it back in the oven and bake for another 8 minutes. Remove the tray from the oven and let it cools down for a few minutes before applying the egg wash. Use a very fine brush to apply the egg wash on the surface of the cakes, make sure not to over-brush the cake (only brush over it once).
Let the cakes cool again for 30 minutes then return them back to the oven for another 8-10 minutes until the cakes turn golden brown.

Moon cakes are best consumed after 2-3 days because it takes some times for the oil from the filling and the dough to soften and change the look of the cakes. These moon cake are best complemented with a good pot of jasmine tea. Hope you all will enjoy it!


Happy Moon Festival everyone!
Mooncake màu turn ra đẹp quá Kat ơi :)) Nhìn hoài mà ko boring hihi
ReplyDeleteNhung cai banh trung thu cua Kat co hoa van dep qua, Kat vui long chi cho minh cho de mua khuon co hoa van y nhu vay nhe. Cam on.
ReplyDeleteHi Anonymous, khuon mình có 2 loại, cái có hình trái đào là loại của Singapore có lò xo rất dễ sử dụng mình thấy có bán trên amazon đó, còn loại kia là khuôn plastic (màu cam bằng nhựa) mua ở VN. Khuôn đẹp là 1 chuyện nhưng lúc in ấn bánh mình phải mạnh tay nén thì mới ra sắc nét được.
DeleteCam on Kat da chi dan can ke ve khuon banh trung thu va cach in an banh.
Delete